Objective
I have a client who wanted me to do some research on openstack. They were particularly interested in how difficult it would be to deploy. Along the way I thought it would be cool to have an openstack cluster at home so that when I needed a running machine to test something out I could spin it up without messing up one of my machines.
SO I started dreaming about Openstack. Cost seemed prohibitive, since most documentation suggests you need a lot of machines. After I found an article that said you could run it on two physical machines, I started looking around for inexpensive hardware. I purchased three HP Proliant DL 380s from Amazon. Amazing machine for $160-$180: Dual CPU with quad cores, 16GB ram, embedded RAID, dual disks, dual power supplies with IPMI controlled power, dual GbE NICs. The price varies based on the supply and the disk capacity; mine came from ServerPlus365.
Implementation
MaaS and JuJu looked really simple, and the article I found used them to deploy on the two machines using containers. I started there and after many trials, swore off Ubuntu and headed towards RDO… I figured out why the Proliants are so cheap — they don’t run CentOS 7 (so therefore, also not RHEL 7). The reason is that the RAID controller isn’t supported, so you can’t even install. Moreover, you can’t really upgrade from CentOS 6 because apparently not all packages get properly upgraded. So after a brief foray into trying Redhat’s latest RDO deployment model, I came back to Ubuntu.
The experience was generally really frustrating. I feel like I’ve found the one path through the maze. If you have the patience to read on, I think you’ll see why. Each failure takes a long time to figure out.
If you follow along, you too might have your own cluster.
Install the MaaS Cluster Controller
I borrowed a windows laptop for this with an attached USB 300GB disk. I could have used one of the three Proliants, but using the laptop would give me more deployable compute capacity.
I downloaded “Trusty” Ubuntu 14.04 LTS server iso using bittorrent; took about 7 minutes. Installed using the MaaS multi-node option. This ultimately was the key — using the packages from the disk and a specific PPA which gave me access to MAAS 1.7. The 1.5 version that comes with the “Trusty” release is so primitive I found it useless. The 1.8 version under Trusty with the maas-maintainers/stable PPA didn’t have the Debian installer, required by the hardware I have (a consequence of the same RAID controller which causes CentOS issues). I tried the “Vivid” release with 1.8 because it supposedly supports the fast install on the RAID, but I couldn’t spin up anything except Vivid instances, which would be fine except there aren’t currently any JuJu charms for Openstack on Vivid.
What maas do you have? Check it here:
apt-cache policy maas{,-dns,-dhcp,-cluster-controller,-region-controller} | grep Installed -B1 -A1
i tried various ways of getting 1.7, and in the end I found a PPA which has the packages I needed. To replicate my experience you’ll need to run:
sudo apt-get install software-properties-common
sudo add-apt-repository ppa:andreserl/maas
sudo apt-get update
sudo apt-get upgrade
sudo apt-get install maas maas-dns maas-dhcp
apt-cache policy maas{,-dns,-dhcp,-cluster-controller,-region-controller} | grep Installed -B1 -A1
Make sure you’re on 1.7.5 or newer.
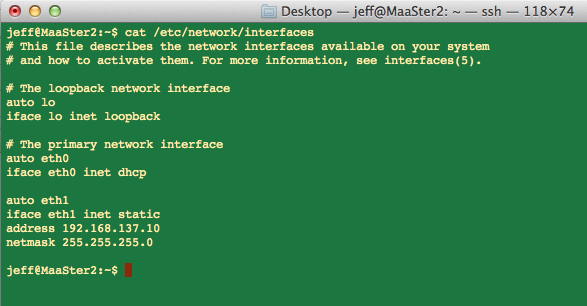
In my deployment, I used two networks: one for the MAAS management and IPMI power control (10.0.1.0/24), and one that goes to the outside world on DHCP managed by my gateway router (192.168.1.0/24). My /etc/network/interfaces file on the MAAS cluster/region controller is:
# The loopback network interface
auto lo
iface lo inet loopback

# The primary network interface
auto eth0
iface eth0 inet static
    address 10.0.1.10
    netmask 255.255.255.0

# wifi
auto wlan0
iface wlan0 inet manual
    wpa-driver nl80211
    wpa-roam /etc/wpa_supplicant.conf

iface default inet dhcp
You can see I am using the wifi for the second network, which is a whole different bag of trouble because the laptop has a broadcom wifi chip that isn’t supported out of the box. I have documented elsewhere how to make that work.
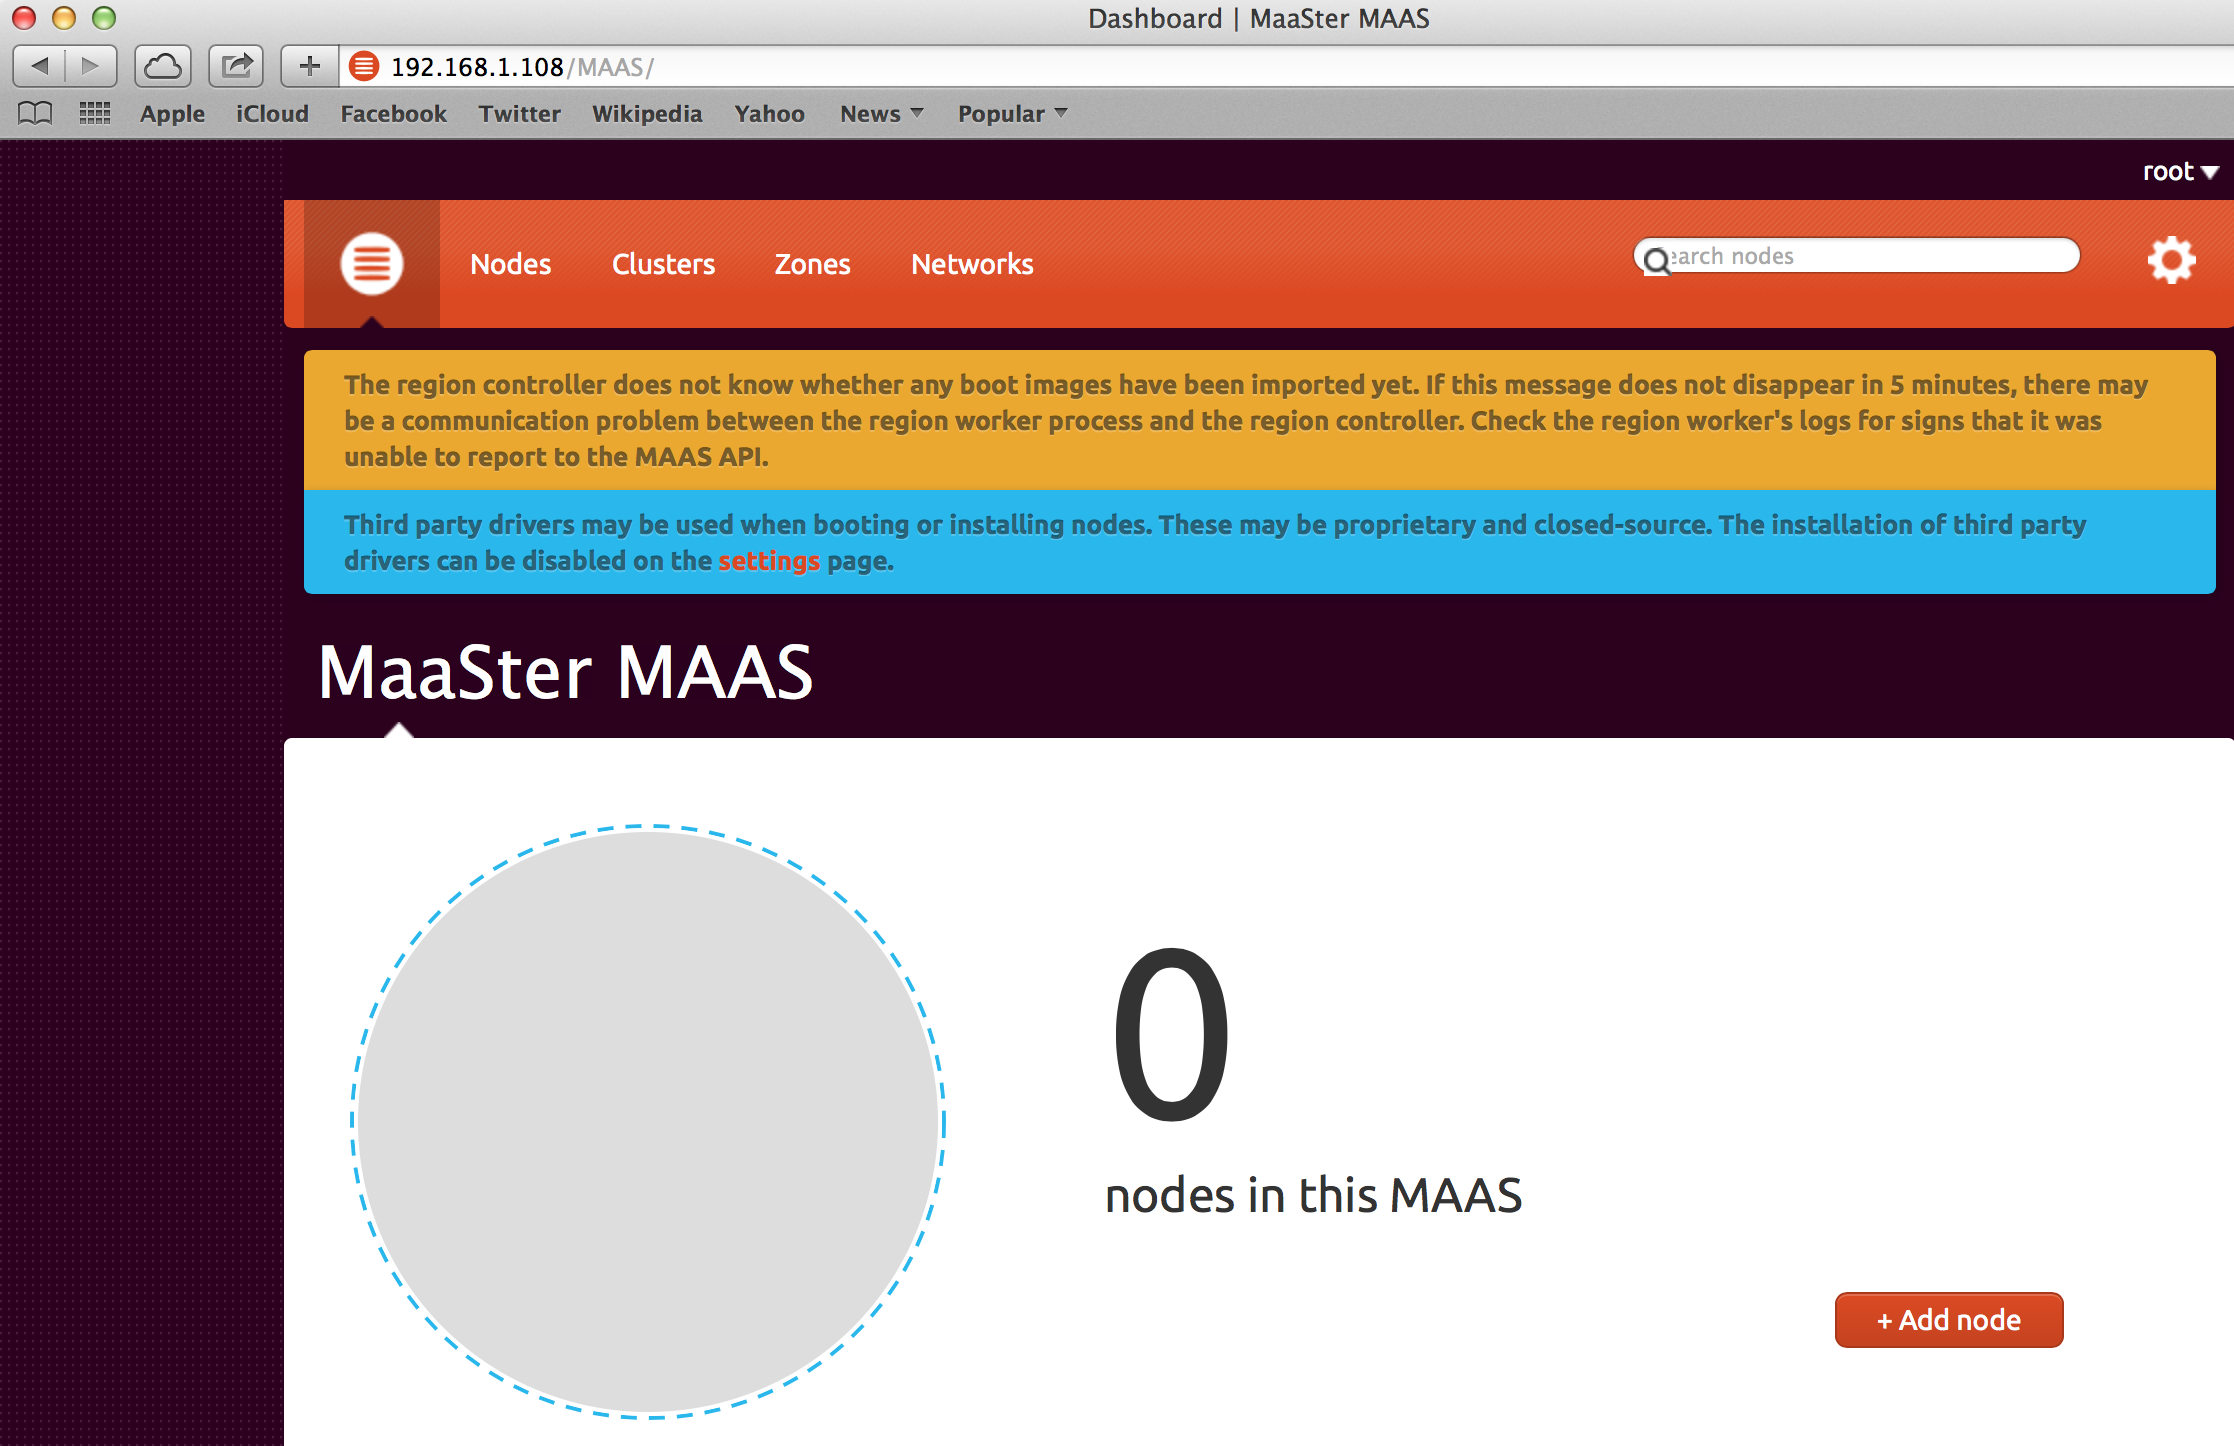
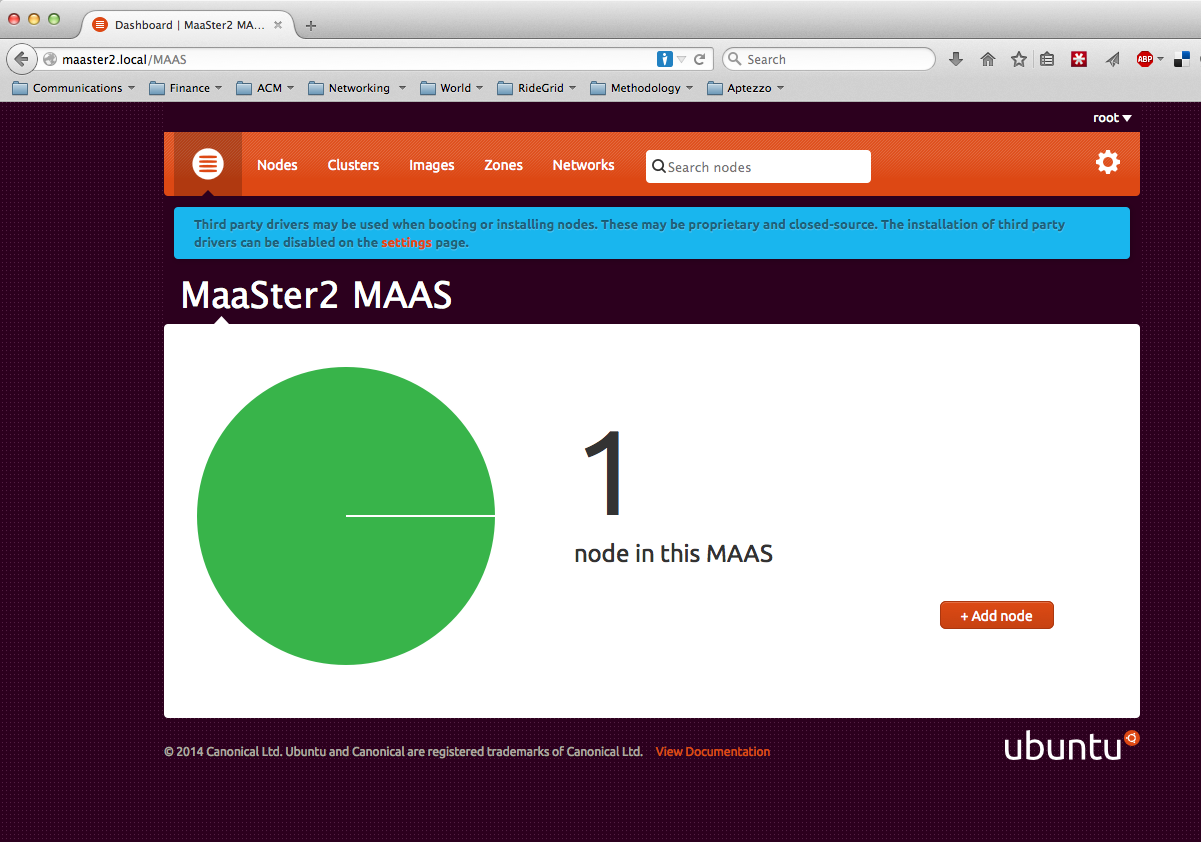
Because avahi daemon is already installed, if you are working from a mac, you can point your browser at the hostname of the cluster controller you just installed with a .local domain, otherwise you’ll need to know its IP address, and browse to http://YOURHOST/MAAS. It will tell you what you need to do, including some command line work to define the admin credentials.
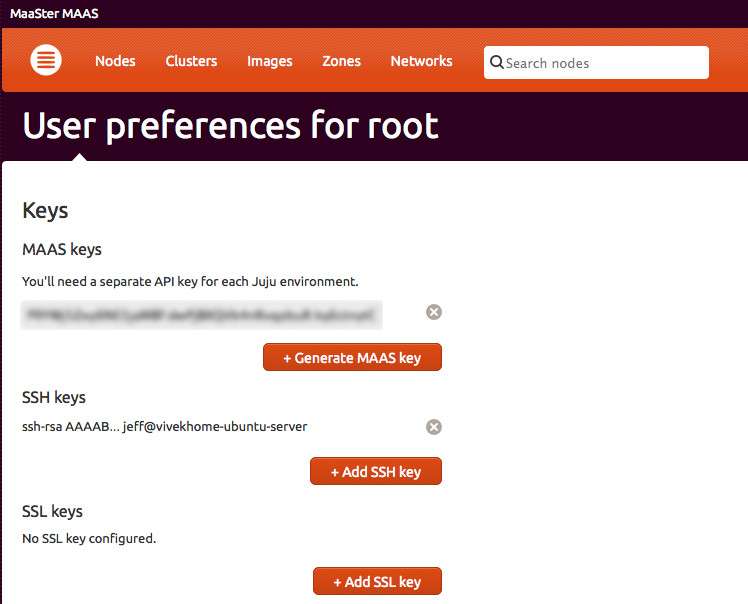
Install your ssh keys. Don’t skip this. This enables you to ssh into the instances JuJu creates. In the upper right hand corner of the MaaS GUI, you’ll see “root” and a drop down. Clicking that allows you to access preferences. You can paste the contents of a public key after hitting “add ssh key” that is paired with a private key on the machine you will log in from
DNS is going to come off the primary Ethernet rather than your cluster controller. If you let the cluster controller manage DNS, then it will add the Zone name to the FQDN when JuJu tries to contact the deployed node. Maybe there is a way to make that work, but in my case the juju client could not connect to the host. However, when you use host.local as your hostname, then mDNS allows the mac to connect to the new instances correctly. If your juju controller is windows then best of luck. Otherwise make sure mdns is in your resolv.conf path.
Configure the hardware
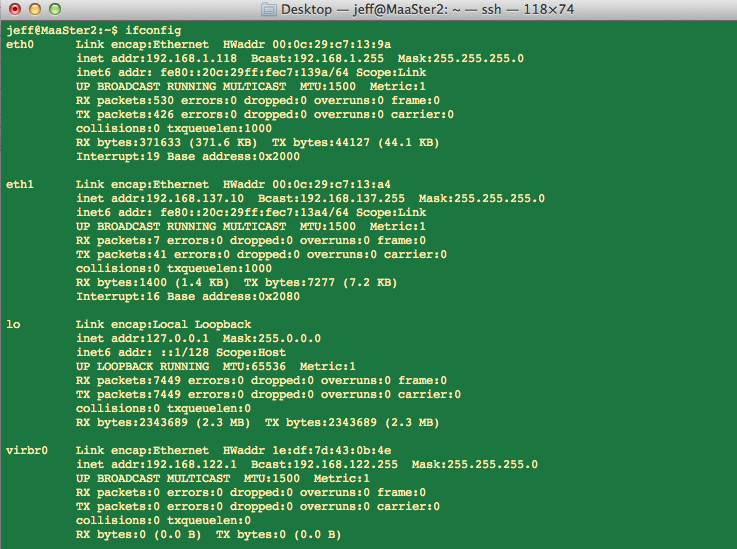
I connected the eth0 of the MaaS hardware to my home network, and eth1 to the MaaS managed network. This doesn’t get brought up connectly under MaaS — the eth0 network doesn’t get brought up.
In the bios, configure for PXE boot from eth1, and order network boot before hard disk boot. Hit F8 during the boot sequence to configure ILO (IPMI). Turn off DHCP in ILO, give it a static address, and a username and a password. I noticed that during enlistment or commissioning, somehow maas made an entry in the ILO name/password. I haven’t tried just using that.
Also make sure “Intel Virtualization Technology” is enabled. This will make the hypervisors perform better. In this model it’s under advanced->processor options.
Enlist your nodes
Turn your nodes on and get them enlisted. They should show up in the MaaS GUI. I named them so I know which one is which (Hansel.local, Gretel.local and witch.local — the witch is the juju bootstrap node). Name your nodes yournode.local, and configure the the cluster controller to manage DHCP but not DNS. I thought that perhaps I could get DHCP from the router and PXE fromt he cluster controller but that doesn’t seem to be the case.
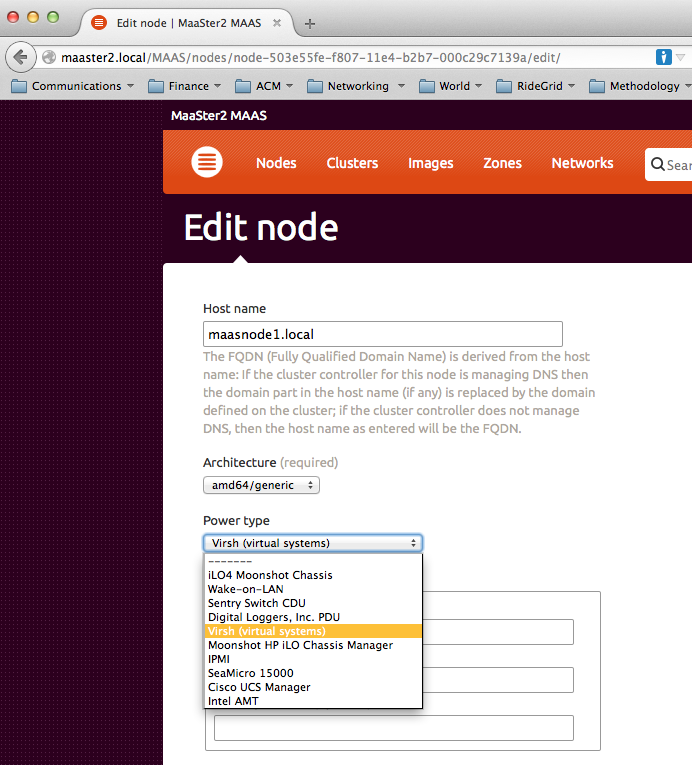
Select the Debian Installer. The fast installer will get a ways but will fail in “curtin”. Apparently the HP Proliant DL 380 names the SCSI array such that the fast installer doesn’t recognize it.
Bootstrap JuJu and configure services
The inspiration for this comes from this posting, for which I am eternally grateful. It would have taken a long time to figure that out. Basically we can run the JuJu GUI in the bootstrap machine directly, and each of the JuJu services in LXC containers on the bootstrap machine as well. The only real problem I had with that is that each container needs a little fixing as it is brought up.
First, install juju on your client machine. I used my main development machine, a mac. That means I’m using four machines for this test.
juju init
will create the environment for you to edit. Edit your resulting ~.juju/environments.yaml file so that you have the following entries. For MAASTER, use the hostname or IP address of your MaaS cluster controller you just set up. For YOURSTRING, also under the preferences pane you’ll find a key under “MaaS keys”. Use that.
default: maas
          maas-server: 'http://MAASTER/MAAS/'
          maas-oauth: 'YOURSTRING'
          default-series: trusty
Then bootstrap your control node. This will allocate one of the MaaS nodes and configure it.
juju bootstrap
Once you see juju waiting to contact the new node, connect to the cluster controller, and ssh from there to the new node with ssh ubuntu@xxx.local. (This assumes by the way, that your private key on the cluster controller has a public key that you pasted into the keys in MAAS. The ubuntu account has no known password – you need the key to get in). You are going to manually add eth0 and configure the default route to use that.
sudo vi /etc/network/interfaces
# Add in:
# auto eth0
# iface eth0 inet dhcp
sudo ifup eth0
sudo route add default gw 192.168.1.1
sudo route del default gw 10.0.1.10
As soon as you do that, juju should continue and finalize configuring the node.
Then wait for that to finish. If you have errors…. something is amiss. Now you can use the bootstrapped node to provision the services including Openstack. We’ll first bring up the JuJu GUI, mainly because it’s cool but it will also give you feedback when things don’t go well.
juju deploy --to 0 juju-gui
juju expose juju-gui
grep pass ~/.juju/environments/maas.jenv
Wait for the juju-gui service to start; if you can’t get this working, no sense making things worse. Because I’m on a mac, I can use the name of my MaaS node directly in the browser’s address bar (in my case “witch.local”, which I use in the following discussion – please replace with your node’s name). Use the password just shown from the grep and the account ‘admin’.
Now start up the containerized services:
juju deploy --to lxc:0 mysql
juju deploy --to lxc:0 keystone
juju deploy --to lxc:0 nova-cloud-controller
juju deploy --to lxc:0 glance
juju deploy --to lxc:0 rabbitmq-server
juju deploy --to lxc:0 openstack-dashboard
juju deploy --to lxc:0 cinder
The problem I mentioned with this recipe is that the containers can’t find their way to the physical juju bootstrap host. To fix this, verify that each container is ‘started’ with:
juju status|grep '0/lxc/[0-9]*:' -A1
Then add the address of the host to each container’s hosts file using a script run on the juju bootstrap server:
#!	/bin/sh
# install this as "fix" and chmod 755 to it
if test $# -ne 1
then
	echo "usage: fix {lxcnum}"
	exit 99
fi
ipaddr=`ifconfig juju-br0|grep 'inet '|sed -e 's/^[^0-9]*://'| awk '{print $1}' `

lxcn=/var/lib/lxc/juju-machine-0-lxc-$1
if test \! -d $lxcn
then
	echo "LXC does not exist: $lxcn"
fi
echo  $ipaddr `hostname`.local >> ${lxcn}/rootfs/etc/hosts
so for example:
for i in 7 8 9 10 11 12 13 ; do
> sudo ./fix $i
> done
The nova-compute setup will take longer so start it now and set up all the relations.
juju deploy nova-compute
juju add-relation mysql keystone
juju add-relation nova-cloud-controller mysql
juju add-relation nova-cloud-controller rabbitmq-server
juju add-relation nova-cloud-controller glance
juju add-relation nova-cloud-controller keystone
juju add-relation nova-compute nova-cloud-controller
juju add-relation nova-compute mysql
juju add-relation nova-compute rabbitmq-server:amqp
juju add-relation nova-compute glance
juju add-relation glance mysql
juju add-relation glance keystone
juju add-relation glance cinder
juju add-relation mysql cinder
juju add-relation cinder rabbitmq-server
juju add-relation cinder nova-cloud-controller
juju add-relation cinder keystone
juju add-relation openstack-dashboard keystone
That will start up your second physical server and make it available for running your work. Once all services are green on the juju-gui, you can log into openstack. Create the password for openstack gui and figure out its address:
juju set keystone admin-password="helloworld"
juju status openstack-dashboard|grep public
point your browser at the IP address you just found followed by “/horizon”, (e.g. http://192.168.1.164/horizon), then log in with the “helloworld” password or whatever you used.
Here I have found I have to mess with routing on my workstation, the JuJu client. I have to tell it how to get to the 10.0.1.0/24 network. It needs to go through the laptop, the maas cluster controller. For me that’s:
sudo route add 10.0.1.0/24 witch.local
Awesome! You are Openstacking.
Configure OpenStack
You probably thought you were done. Unfortunately the network is not properly set up yet. I’m not sure why the nova-compute charm doesn’t set up at least some of this. You need to connect the bridge network to your actual network. Ultimately I used juju-br0, already bridged to eth1, as follows:
On the JuJu gui, select the nova-compute charm and then the wrench for settings on the left. Change the “bridge-interface” from br100 to juju-br0. Then hit commit and confirm.
On each nova-compute node, login (ssh ubuntu@north.local for me) install the nova command line and set the environment variables to get the create-network command to run:
sudo apt-get install python-novaclient
export OS_TENANT_ID=86f6dad7c72222dbed1683fe8ef34ca
export OS_AUTH_URL=http://192.168.1.171:35357/v2.0
export OS_USERNAME=admin
export OS_PASSWORD=helloworld
The Tenant ID can be found from the openstack GUI under the “Access and Security” settings when logged in with admin user, using the “Project” (Tenant) called “admin”. Use “juju status keystone” to find the address of the OS_AUTH_URL. Then, still on the nova-compute node, execute:
nova network-create vmnet --fixed-range-v4 10.0.0.0/16 --fixed-cidr 10.0.20.0/24 --bridge juju-br0
Use the openstack dashboard to create one or more Tenants, also called Projects. Then you create Users. Each user logs in and creates an SSH key for access to their instances. Using names without spaces will make command line work later easier.
If you launch instances and never see anything under the log tab after clicking the instance name, then you probably messed up the image import. The target of the image URL is a.img (ISO). It won’t complain if you do something else, it will just fail to start the instance. The other symptom I’ve seen is an image that never leaves the “Queued” or “Saving” state – I have had this problem with the windows image described at http://www.cloudbase.it/windows-cloud-images/ so I’ve given upon that for now.
Your instance size should be small or larger. The tiny instance won’t work with the ubuntu images, and the failure was not clear.
Now boot an instance from the openstack dashboard. It now comes up and you can ping it from the nova-compute node at the IP address shown in the Horizon GUI.
Configure the security group (default) to do whatever you want. I put in three rules to open up all traffic. If you forget this, you won’t be able to access the instances even within your network.
Create a floating IP address pool. I created one with a single entry for demo purposes, drawn from my main network’s subnet. That way I can port forward to it in my router. If you don’t do this, the network that is being managed by openstack (the 10.0.0.0/16 subnet) will be cut off unless you configure the nova-compute node for NAT’ing.
nova-manage floating create --pool nova --ip_range 192.168.1.230
Now attached that to an instance that I want to be seen outside. I was kind of worried that it wouldn’t figure it out and route to it but it does — it has to go through the nova-compute node, so make sure forwarding is turned on there. This should say ‘1’:
cat /proc/sys/net/ipv4/ip_forward
I wrote a script to assign floating IP addresses. My DHCP server only allocates up to 192.168.1.199 on a class C, so I allocated 20 addresses as follows:
#!      /bin/sh
ipx=200
while test $ipx -lt 220
do
        ip=192.168.1.$ipx
        echo puttting IP address $ip in the pool
        sudo nova-manage floating create --pool nova --ip_range $ip
        ipx=`expr $ipx + 1`
done
Annoyances
If you shut down the cluster from the MaaS GUI – select the nodes and “stop” them, then later “start” them — The juju-gui thinks all the services are happy, but there may be connection errors in the compute node that prevents starting and launching instances. nova service list shows that nova-network did is not running:
ubuntu@north:/etc/init.d$ nova service-list
OS Password:
+----------------+----------------------+----------+---------+-------+----------------------------+-----------------+
| Binary         | Host                 | Zone     | Status  | State | Updated_at                 | Disabled Reason |
+----------------+----------------------+----------+---------+-------+----------------------------+-----------------+
| nova-conductor | juju-machine-0-lxc-2 | internal | enabled | up    | 2015-06-14T18:18:35.000000 | -               |
| nova-cert      | juju-machine-0-lxc-2 | internal | enabled | up    | 2015-06-14T18:18:35.000000 | -               |
| nova-scheduler | juju-machine-0-lxc-2 | internal | enabled | up    | 2015-06-14T18:18:35.000000 | -               |
| nova-compute   | north                | nova     | enabled | up    | 2015-06-14T18:18:34.000000 | -               |
| nova-network   | north                | internal | enabled | down  | 2015-06-14T02:13:33.000000 | -               |
+----------------+----------------------+----------+---------+-------+----------------------------+-----------------+
And this document states that
Also, in practice, the nova-compute services on the compute nodes do not always reconnect cleanly to rabbitmq hosted on the controller when it comes back up after a long reboot; a restart on the nova services on the compute nodes is required.
which is great except there is a lot of information about how to do this that doesn’t seem correct for maas/juju/ubuntu. Apparently this is what they mean (run on the nova-compute nodes):
sudo service nova-compute restart
Having said that, since I installed from the 14.04 DVD and then used the ppa above, it has booted reliably each time. Moreover I have had no problems with LXC containers, which I did when using the juju-maintainers/stable ppa.
Conclusion
I hope your experience goes smoother than mine. I hope you have a usable openstack in your garage too.